Darken Image Online
Upload an image and darken it with contrast, vignette, and tint controls.
Sometimes, an image can be too bright. An image captured during very bright sunlight results in the sky looking very washed out and no details of the clouds are visible. A portrait taken using a flash very close to the subject results in very dull colors, giving an image that looks like it has been whitened. The product image with a white background is too bright and washes out color and detail.
In all these cases, the way out is to darken image – to lower the tones, restore details, and achieve harmony again. With the help of Free Photo Darkener you can adjust the brightness of photo directly in the browser without any additional software. Upload your photo, use the slider, and download the processed image. It’s possible to darken a photo online, darken an image online, or work with other graphics – for free, and without any watermarks. Supports JPG, JPEG, PNG, and WebP formats.
What is Darken Image?
When you decrease the brightness of an image in a digital editing program, the tonal value of every single pixel gets adjusted to a lesser tonal value within the 0 – 255 range used for encoding colours digitally. The red, green and blue channel values are all decreased by a proportional amount.
This is similar to underexposing the camera image after taking the picture. The overexposed picture has excess light; the highlights have been blown out to white, the mid-tones have been crushed, and the shadows which give contrast have been raised to gray. Diminishing the brightness in the brightness slider in the online photo editor does the opposite.
There are three distinct mechanisms for making an image appear less bright:
Brightness reduction
A consistent lowering of the value of all pixels. All pixels become dimmer equally. This is the simplest and the one most frequently required – the basic purpose of this image darkener software.
Contrast increase
Extends the difference between lightest and darkest shades. Dragging shadows darker and highlights brighter at the same time enhances the differentiation without decreasing brightness. Boost the contrast level of the image along with dimming for more movie-like effects.
Saturation reduction
When the color intensity is pulled down, the picture becomes dull. This is because it is a secondary method of darkening; pulling the saturation will only fade out the picture while lowering brightness will darken the picture.
How to Make Photo Darkener Online
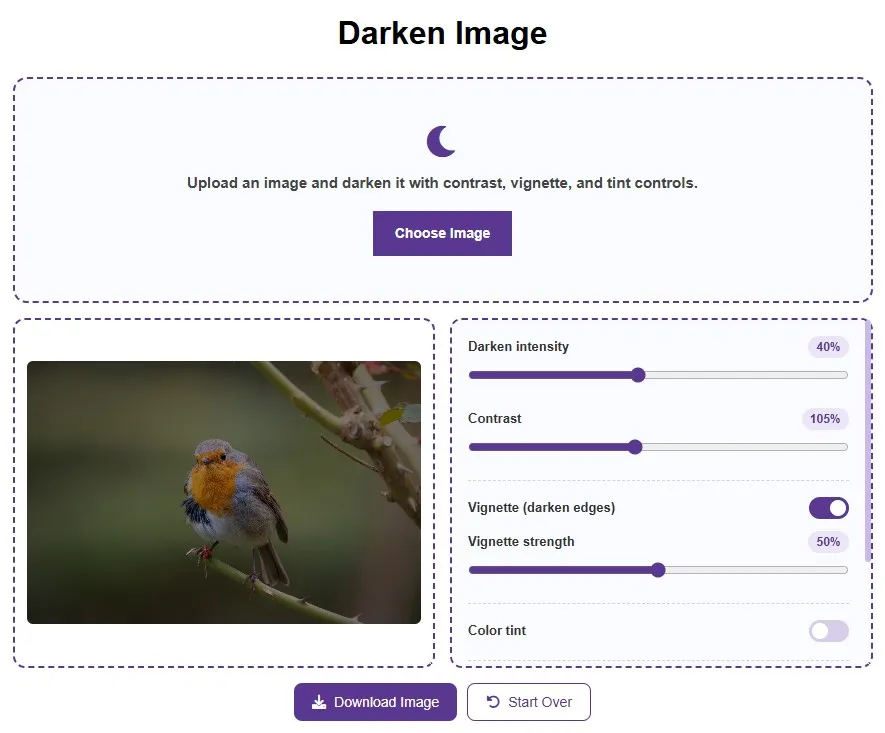
- Step 1: Upload your image. Click the upload area or drag and drop your file. The tool accepts JPG, JPEG, PNG, and WebP. The photo appears in the preview instantly.
- Step 2: Adjust the slider. The Brightness slider shifts the tone lower than the starting point. The live preview changes instantaneously. It is best to use a reasonable number initially and then build up gradually — small changes maintain details better than a big change at once.
- Step 3: Preview the result. Always check how the adjusted picture looks when compared to the initial picture. Check that everything is balanced properly.
- Step 4: Download. Click to save the edited image in JPG or PNG format. The file will not have any watermark. It is now safe to distribute or print.
Why You Might Need to Reduce Image Brightness
Understanding what caused the excess brightness helps you choose the right correction level and avoid the same problem in future work.
Overexposure: Too Much Light at Capture
Overexposure is the primary cause of pictures coming out as washed out. This happens when the amount of light entering through the lens exceeds the needs of the particular scene – producing washed-out highlights, midtone colors without proper range and no texture in the bright parts.
Common causes
Outdoor photography in direct sunlight without adjustment of aperture or shutter speed; use of too strong flash for the distance; metering system that has been tricked by a dark subject in front of a bright background; wrong manual settings.
Through the use of this software as an image darkening tool post-acquisition to reduce exposure, the lost tonal range is restored. The color intensity is restored. There is now separation of midtones.
Flat, Glaring Lighting Conditions
Photographs taken in lighting conditions where the lighting source is broad and flat such as cloudy days or fluorescent lighting in an office or photographs taken inside product studios using soft boxes without shadows have been found to appear too bright. It is not because the photograph is overexposed but rather because there are no shadows.
Preparing Assets for Dark Mode Interfaces
Dark mode has been adopted as an essential element in operating systems, browsers, and applications. Balanced-looking images on light backgrounds may seem too bright in dark mode where the UI background is very dark in color.
For web designers and user interface developers, this kind of online tool for editing image brightness comes in handy while making the tone of images suitable for dark mode usage, where the tone of the image needs to match the surroundings instead of clashing with them. This is the free dark mode image converter process, which requires just this tool.
Reducing Screen Glare for Nighttime Viewing
The wallpaper for a cell phone, the background for an app used at night time, or the display on your car’s dashboard seen in the dark can all be aided by having an image with low brightness. A picture that is correctly exposed to the light appears too bright when put against a dark background. Making such a low exposure image for the web is a practical example of applying brightness reduction.
Brightness vs Contrast vs Exposure vs Gamma vs Saturation
Photo editing tools use several related but distinct adjustments that all affect perceived image luminosity. Understanding what each does helps you choose the right one.
Brightness: Equal shifting of all pixels either upwards or downwards. In case the user decides to reduce the brightness level of the image through use of the slider in the above brightness tool, all pixels will have their brightness reduced by the same value.
Contrast: The difference between the darkest and lightest values in the image. The higher the photo contrast, the brighter the brightest values and the darker the darks at the same time, but not necessarily the average value. It is the combination of low average brightness and high contrast that gives a spectacular effect.
Exposure: In RAW photography editing program, exposure alteration works to simulate the camera’s sensor reaction to having more or fewer amounts of light during image capture. In the case of the JPEG and PNG files that are being edited in an online photo editor brightness editor, reducing brightness works similarly.
Gamma: Non-linear adjustment that affects mainly the mid-tones without any proportional alteration to the highlights and shadows. Value of gamma less than 1.0 will pull down the mid-tone while a value greater than 1.0 will push up the mid-tones.
Saturation: Color intensity. The decrease in saturation will desaturate colors making them closer to grey. A combination of the decrease in saturation with the decrease in brightness results in creating a faded look that is different from just a dimmed picture.
How Much to Reduce Photo Brightness?
The right amount of brightness reduction depends on the original image and the intended use.
For overexposure correction: Begin with a reduction of 10-25%. This is generally enough to regain the lost highlights and ensure that the correct color saturation returns in an image that is slightly overexposed. Increase incrementally until a balance is struck, but do not overdo it.
For text overlay backgrounds: Shoot at an angle where the white text will be easily discernible from the background picture. Normally, photographs taken under the natural sunlight will need to be resized by 35% to 55%.
For moody or editorial aesthetics: A combination of a 20–40% decrease in exposure and a moderate increase in contrast gives us the low-key style. Any value beyond 50% results in near-silhouette effect, which is used very sparingly for artistic purposes.
For dark mode UI assets: Generally reduced by 15-35%, based on the darkness of the surrounding interface. Always preview the altered image on the real background color of the dark mode interface before download.
For social media backgrounds and cover images: Usually between 25%-45% lower than the original, in the case of images used as background graphics underneath logos or text. The objective is that the background will remain visible, but not compete.
Faqs
How do I make an image darker online for free?
Open darken image tool, upload your JPG, PNG, or WebP image, move the slider to make the image darker as per your requirement, and then click download. No need for registration or watermark here. It is an absolutely free darken image software - darken image free, darken photo free - with no restriction on its usage.
How do I fix an overexposed photo?
Simply upload your overexposed picture to the software. Then adjust the brightness slider to a lower level – begin from 15-25% decrease if your image is slightly overexposed. With this method of lowering the brightness of the picture, you can easily cope with most cases of overexposure of JPEG images.
How do I dim a PNG image online?
Upload your PNG file at free photo darkener, slide the brightness adjustment slider to decrease luminosity, and save as PNG. The lossless PNG file format is maintained throughout, which means you can darken PNG image files without any loss in quality due to compression.
What is the best approach for a dark mode image asset?
First, upload the picture and decrease the brightness by 15%-35%. This will depend on the darkness of the color of the interface you have. View the new image in context of your actual dark mode background color before saving the file. This dark mode picture converter process uses no extra software.